A battery charger may look normal while delivering too little voltage, no output, or an unstable reading. A multimeter offers a quick way to check its output before you blame the battery. Still, one voltage reading cannot confirm that a charger is healthy under load. Charger designs and battery chemistries differ, so compare your measurements with the manufacturer’s specifications. Small details matter. A reversed probe or incorrect meter setting can confuse the result, and careless contact can short the terminals.
This guide explains How to use a multimeter to check battery charger output through ten practical tips. You’ll learn how to choose DC voltage, identify the output terminals, place the probes, and interpret the display. Start with the charger disconnected from the battery, unless its instructions specify a different test. Keep the probe tips steady and separated. Never use the meter’s current setting across the charger’s output; that can create a short circuit. If the reading jumps, check your contact before assuming the charger has failed. Some chargers pulse or regulate their output, so a simple no-load test may not tell the whole story. I’ve found that easy to overlook. Use these checks as a first assessment, not a substitute for the manual or qualified service when readings remain unclear.
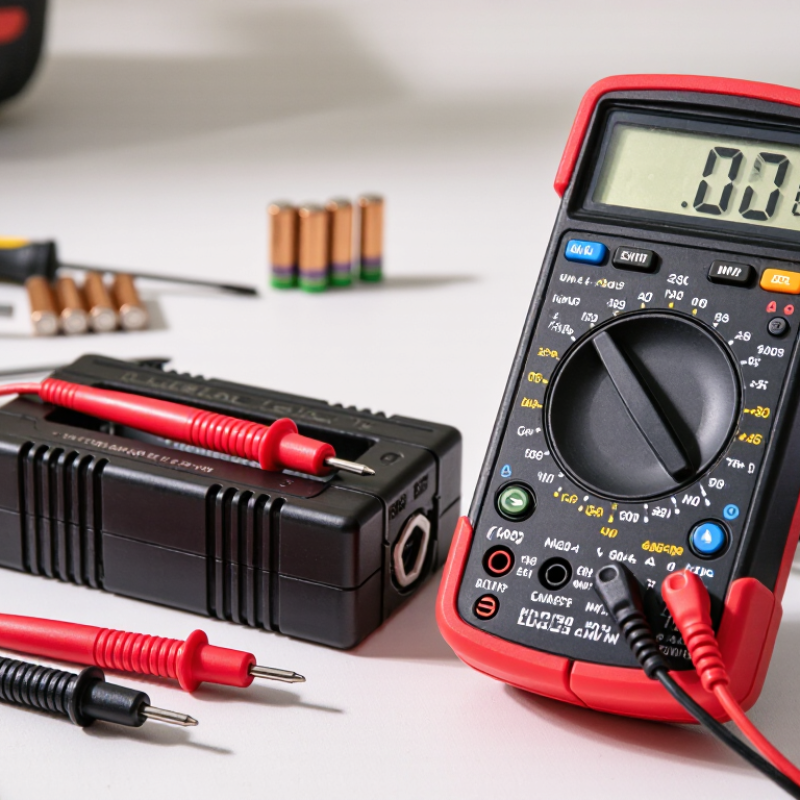
Read the charger label and battery documentation before connecting meter probes. Check the rated DC output, charging current, polarity, and supported battery chemistry. A battery’s nominal voltage is not necessarily its charging voltage. The correct limit depends on the battery type and charging profile. If the specifications are missing or unclear, pause rather than guess.
Set the multimeter to DC volts, choose a suitable range, and inspect its leads for damaged insulation. Work on a dry, stable surface, and keep probe tips from touching each other.
Small detail. It matters.
Measure across the output terminals with the charger connected only as its instructions allow. Never place the meter in current mode directly across the output; that can create a short circuit. Unplug the charger before changing meter modes. A voltage reading alone does not prove the charger can deliver its rated current.
NFPA’s Home Fires Involving Electrical Failure or Malfunction report estimated 46,700 U.S. home fires per year during 2015–2019, causing 390 deaths and $1.5 billion in direct property damage. These figures cover electrical failures broadly, not charger testing specifically, but they underscore why careful setup matters.
Top 10 Tips to Test Battery Charger Output with a Multimeter
Set Up the Multimeter for Battery Charger Output Testing
Before connecting anything, inspect the charger leads and meter probes for cracked insulation or loose tips. Insert the black lead into COM and the red lead into the voltage input. Select DC volts, not AC volts or current. Choose a range above the charger’s expected output, or use auto-range. Small detail, big difference.
For a 12-volt lead-acid battery, a charger’s reading can vary with charging stage, temperature, and battery condition. Battery University’s “Charging Lead Acid” guide gives a typical absorption range of 2.30–2.45 volts per cell, or about 13.8–14.7 volts for a six-cell battery. IEC 60095-1:2018 identifies 12-volt starter-battery requirements; that nominal rating is not the charger’s required output. Don’t treat one reading as a verdict.
Tip: Set the meter before touching the terminals. With the charger connected to power as its instructions specify, place the probes across the output: red to positive, black to negative. Keep metal probe tips from touching each other. A reversed reading usually shows a minus sign, but pause and check polarity rather than guessing. Record the reading and charging conditions; I would recheck after a short wait, since one snapshot can mislead.
| # | Testing Tip | Multimeter Setup and Action | What to Check |
|---|---|---|---|
| 1 | Confirm the charger’s output specifications | Read the charger label or manual for its output voltage, battery type, and polarity before testing. | Use the charger’s stated specifications as the reference; charging voltage depends on battery chemistry and charging stage. |
| 2 | Inspect the equipment first | Check the charger leads, insulation, clamps, meter leads, and meter case for damage before use. | Do not use damaged leads or equipment. Keep the test limited to the charger’s low-voltage output; do not probe mains wiring. |
| 3 | Connect the meter leads to the correct sockets | Insert the black lead into COM and the red lead into the socket marked V or VΩ. | Do not put the red lead in an amp or current socket for a voltage test. |
| 4 | Select DC voltage mode | Set the dial to DC volts, commonly shown as V⎓. If the meter is not auto-ranging, choose a range above the charger’s rated output. | Do not use AC volts or resistance mode to measure a powered charger output. |
| 5 | Check polarity before reading | With the charger disconnected from mains power, place the red probe on the positive output and the black probe on the negative output. | A minus sign on the display usually indicates the probes are reversed relative to the output polarity. |
| 6 | Prevent probe contact between terminals | Touch each probe to only one output terminal and keep exposed metal probe tips from bridging the terminals. | A short circuit can damage equipment or cause sparks. Use insulated probes and a stable work surface. |
| 7 | Power the charger only after probes are positioned | Once the probes are securely placed on the low-voltage output terminals, connect the charger to its power source as directed by its manual. | Keep hands clear of the probe tips and follow the charger’s operating instructions. |
| 8 | Allow for smart-charger behavior | If the output reads near zero with no battery connected, consult the manual and repeat the test only using the specified battery connection procedure. | Some smart chargers may not provide a normal output until they detect a battery, so a no-load reading alone may not indicate a fault. |
| 9 | Interpret voltage in context | Compare the reading with the charger’s stated output and the battery manufacturer’s charging requirements. | For example, a 12 V lead-acid battery charger may use different voltages during bulk, absorption, and float charging; there is no single correct reading for every charger or stage. |
| 10 | Disconnect safely and record the result | Turn off and unplug the charger before removing the probes. Record the displayed voltage, test conditions, and whether a battery was connected. | A voltage test does not measure charging current or prove the charger performs correctly under load. Use the manufacturer’s diagnostic procedure for further checks. |
To measure a charger’s DC voltage without a battery connected, start with the charger unplugged. Check its leads and casing for damage, then set the multimeter to DC volts. Choose a range above the charger’s expected output, or use autorange. Put the black probe in COM and the red probe in the voltage socket. Never use the current setting across the charger terminals; that can create a short circuit.
Keep the charger unplugged while placing the probes on the matching output contacts. Connect red to positive and black to negative, using insulated probe tips where possible. Keep the metal tips from touching each other. Now plug in the charger and read the display. Be steady. Some chargers show a voltage with no battery attached, while others need to detect a battery before they activate. A zero reading does not always mean the charger is faulty.
Compare the result with the charger’s stated output voltage, allowing for small fluctuations or pulsed readings. I find it easy to trust one number too quickly; that can be a mistake. If the reading jumps, note its range and repeat the check without shifting the probes. Voltage alone cannot confirm that a charger can deliver its rated current or charge a battery correctly. Unplug the charger before removing the probes.
Set the multimeter to DC volts and keep the charger connected to the battery. Place the red probe on the positive terminal and the black probe on the negative terminal. A stable reading shows the voltage at the battery posts, not the charger’s isolated output.
Keep clips clear of moving parts, and avoid letting the probes touch each other.
For a conventional 12-volt lead-acid battery, IEC 60095-1:2018 describes a six-cell system with a nominal 2 volts per cell. During charging, the measured voltage may rise above 12 volts; the correct range depends on battery chemistry, temperature, and charging stage. Compare the reading with the battery and charger specifications, rather than treating one number as universal.
I still find this easy to misread. A low reading can reflect a deeply discharged or faulty battery, while a smart charger may briefly pause or change its output. Battery Council International’s technical guidance likewise emphasizes matching charging settings to battery type.
Record the voltage after a few minutes, then check again later. A rising value can be useful evidence, but it does not prove the battery can hold a charge.
A multimeter can show whether a charger is producing voltage, but the number needs context. Set the meter to DC volts and choose a range above the charger’s stated output. Check the label. With the charger disconnected from the battery, place the red probe on positive and the black probe on negative. Never use current mode across the terminals; that can cause a short circuit. Some smart chargers show little or no voltage until they detect a battery, so an unloaded reading alone may not prove the charger is faulty.
Tips: Compare your reading with the charger’s rated output and instructions. A 12-volt lead-acid battery charger may show roughly 13.6 to 14.7 volts while charging, depending on its stage and design. Other battery chemistries require different settings. Keep probe tips steady, and stop if a cable, plug, or casing looks damaged.
A reversed negative reading usually means the probes are swapped. A persistently low reading may point to a poor connection, damaged cable, blown internal fuse, or charger fault. A reading that rises and falls can be normal for a pulsing smart charger, but it may also signal an unstable connection. Recheck the setup before drawing a conclusion. If the output remains outside the manufacturer’s specified range, avoid using the charger and have it inspected. One reading can fool you; the battery’s condition and charger type matter too.
Illustrative voltage readings measured at the charger terminals in different operating conditions.
How to interpret: A 12 V lead-acid charger commonly measures about 13.5–13.8 V in float mode and 14.2–14.7 V during absorption. A persistently low reading may indicate a disconnected supply, faulty charger, or poor connection; excessive voltage may point to a regulation problem. Readings vary with battery chemistry, temperature, charge stage, and load. Check the charger's specifications and battery guidance before drawing conclusions.
Read the charger label and battery documentation. Confirm output voltage, charging current, polarity, and battery chemistry. If details are unclear, stop.
Select DC voltage and choose a range above the expected output. Autorange can also work. Inspect the leads for damaged insulation.
Place the black probe in COM and the red probe in the voltage socket. Connect red to positive and black to negative. Keep the tips apart.
Yes, if the charger instructions allow it. Connect the probes while unplugged, then power the charger. Some chargers show zero without battery detection.
Some chargers produce pulsed or fluctuating output. Record the voltage range and repeat the test without moving the probes. One number may mislead you.
No. Current mode can create a short circuit and damage equipment. Unplug the charger before changing meter settings.
Measure directly across the battery terminals. Place red on positive and black on negative. The reading shows battery-post voltage, not isolated charger output.
No. Voltage alone does not confirm rated current or proper charging. A low reading may indicate a weak battery, deep discharge, or charging pause.
Charging voltage can exceed nominal voltage. The correct level depends on chemistry, temperature, and charging stage. I sometimes treat 12 volts too simply.
Record it after several minutes, then check again later. A rising voltage provides useful evidence, but it does not prove the battery holds charge.
How to use a multimeter to check battery charger output starts with understanding the charger’s rated voltage and following basic safety precautions. Inspect the charger and leads for damage, work in a dry area, and set the multimeter to the appropriate DC voltage range before testing. With the charger disconnected from a battery, connect the meter probes to the charger’s output terminals, matching positive to positive and negative to negative. Compare the reading with the charger’s stated output, keeping in mind that some chargers may show changing or pulsed voltage when no battery is attached.
For a more complete check, connect the charger to a compatible battery as directed by its instructions, then measure the output again without allowing the probes to touch each other. Consider both the reading and any normal charging changes rather than relying on one measurement alone. A voltage that is absent, unstable, or far outside the expected range may indicate a faulty charger, damaged cable, poor connection, or battery issue. Disconnect the equipment safely and consult the charger’s guidance if results remain unclear.

Hyper Charger